Category Archives: Certificates

How to Create TLS Certificates using OpenSSL with wildcards in the SAN

UPDATED 2/4/2021
UPDATE 4/16/2021 – Added commands to

Below are the basic steps to use OpenSSL and create a TLS certificate request using a config file and a private key. You will first create/modify the below config file to generate a private key. Then you will create a .csr. This CSR is the file you will submit to a certificate authority to get back the public cert. Once you have the private key and the resulting public certificate, you will chain them all together (including the CA’s public certs) to create a certificate that you will install on a linux server, load balancer or even convert it to a .pfx file for windows. I’ve been doing this for years and it works very well.

Some gotcha’s… If you are creating wildcard certificates, you always have to have the root domain and the *.domain in the certificate.
For example, if you wan to create a certificate with domaina.com and domainb.com, and support all names like www.domaina.com, abc.domaina.com AND domaina.com, you need to have both the *.domaina.com and domain.com in the SAN area of the config file. Look carefully at the file below. you will see both in it.

Create a config file

Modify this config file to use to create your certificate.

## Start of File
# OpenSSL configuration to generate a new key with signing requst for a x509v3
# multidomain certificate
[ req ]
default_bits = 2048
default_md = sha256
default_keyfile = key.pem
prompt = no
encrypt_key = no
# base request
distinguished_name = req_distinguished_name
# extensions
req_extensions = v3_req
# distinguished_name
[ req_distinguished_name ]
countryName = "US" # C=
stateOrProvinceName = "Minnesota" # ST=
localityName = "Your City" # L=
organizationName = "Your Company" # O=
commonName = "domain.com" # CN=
# req_extensions
[ v3_req ]
# The subject alternative name extension allows various literal values to be
# included in the configuration file
# http://www.openssl.org/docs/apps/x509v3_config.html
subjectAltName = DNS:*.domain.com,DNS:domain.com,DNS:domainb.com,DNS:*domainb.com # multidomain certificate
## End of File

Generate a key for the new certificate.

You could re-use a key but that’s not so secure so always generate a new key every time!

openssl genrsa -out <private key file name>.key 2048

Create the CSR request.

Use the .cnf you created in step 1

openssl req -new -key <private key file name>.key -config <DomainName>.cnf -out <csr file name>.csr

Submit your CSR

Open your .csr file in a text editor (Never use Notepad) and copy the contents. Then submit it to an authority (internal for our sake) and then down load your certificateĀ as a base64. If you are going to submit it to an online authority, use a repeatable authority like DigiCert. Don’t use Thawte or Symantec. They are going away soon.

Merge your public key

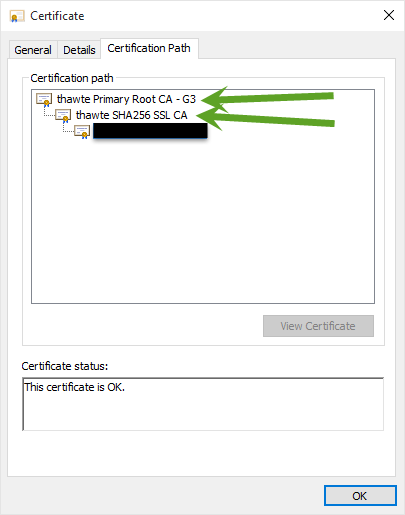
Merge your public key, intermediate cert, root cert, and private key (in that order) and save it as a .pem file

NOTE: if this is for a public website, you don’t need to add the root cert to the chain. The browsers computers should have that and it’s trusted more if you leave the root out.

Should look like this (replace your public key and private keys at the top and bottom)

-----BEGIN CERTIFICATE-----
### Replace me with the certificate you received from the authority ###
-----END CERTIFICATE-----
-----BEGIN CERTIFICATE-----
### INTERMEDIATE CERT HERE ###
-----END CERTIFICATE-----
-----BEGIN CERTIFICATE-----
### ROOT CERT HERE ###
-----END CERTIFICATE-----
-----BEGIN RSA PRIVATE KEY-----
### replace me with your .key file ###
-----END RSA PRIVATE KEY-----

If necessary, convert your cert from PEM to PFX

If you need to convert your cert from .PEM to .PFX. If you dont need a friendlyname, omit that:

openssl pkcs12 -export -out CERTNAME.pfx -in CERTNAME.pem -name "friendlyname"

Copy your certificate over to your server and install it. You can either install it using the Certificates MMC or import it into IIS. If you are using a .pem file and working on linux, you can import the cert into your load balancer of linux server of choice.

How to add a AD CA certificate to Windows 2012 RDP for PCI compliance

For PCI compliance, a requirement is to have RDP port 3389 connect with TLSv1.1 or TLSv1.2 and have the certificate have the same name as the server. Most servers issue self signed certificates which is not acceptable with PCI compliance.

To fix this, you have to re-issue new certificates from a trusted CA. You should use an internal CA within your company to avoid the cost of purchasing and maintaining certificates for RDP services.

How to issue and import a certificate:

Issue a certificate from your Root CA. You can go through the process I’ve outlined to create a certificate using OpenSSL

Import the certificate to the store using MMC and add the Certificates snapin

Move the Root and Intermediate to the correct store

Get the SHA1 thumbprint off of the certificate by opening up the certificate, go to the “Details” tab and scroll down to below the Thumbprint algorythm and selecting the “Thumbprint”
highlight the thumbprint
copy the thumbprint into a Command Shell and remove the spaces and the hidden character at the beginning.

Put the thumbprint in this command and run it on the server

wmic /namespace:\\root\cimv2\TerminalServices PATH Win32_TSGeneralSetting Set SSLCertificateSHA1Hash="<EnterSHA1ThumbprintHere>"

Restart Remote Desktop Services Note: this will disconnect you from your RDP session.

Log back in and you should not be prompted.

Retest by scanning your computer with Nessus or another approved scanning software.

How to change the Friendly Name on a certificate -Windows

I ran into the situation where someone created and applied a certificate in IIS and the friendlyName was wrong. During automatic deployments of the software, they would call into the cert store and select the certificate to use for their 443 bindings based on the friendly name. The certificate was named wrong and wouldn’t get applied during deployment or it would apply the wrong one.

Here is how to fix this using PowerShell without re-issuing the certificate.

Open up PowerShell with administrative rights and change your location to the certificate store.

We will change the certificate with the thumbprint named wrong_internal_wildcard to right_internal_wildcard

PS C:\Users\ed> set-location cert:
PS Cert:\> cd .\\localmachine\My
PS Cert:\localmachine\My> Get-ChildItem


   PSParentPath: Microsoft.PowerShell.Security\Certificate::localmachine\My

Thumbprint                                Subject
----------                                -------
EC1D0A14FA9BAD91DA24B9F87ECBCDB63E9D6F6A
E09D1799FC7F5791797EC39ED75A90345D1EE080  CN=IssuingCA, DC=domain, DC=com
A0102DDEFE92D57E8136B150F1DAEC4DA628B2AD  CN=AnotherCA, DC=domain, DC=com
8F5A004D9F831A9EA18374C3367796F6075AA578  CN=*.domain.com, O=company, L=city, S=state, C=US

PS Cert:\localmachine\My> $cert = Get-ChildItem 8F5A004D9F831A9EA18374C3367796F6075AA578
PS Cert:\localmachine\My> $cert.FriendlyName
wrong_internal_wildcard

PS Cert:\localmachine\My> $cert.FriendlyName = "right_internal_wildcard"
PS Cert:\localmachine\My> $cert.FriendlyName
right_internal_wildcard

In the above example, I have done the following:

    1. Opened Powershell


    1. Set-Location to the certificate store by typing Set-Location cert:


    1. Listed out the certs by typing Get-ChildItem


    1. Located the cert I wanted to change the friendly name of


    1. Put that cert in a variable so I could view it’s properties


    1. Verified that the cert is the right one by typing $cert.friendlyname


    1. Then changed the friendlyname by typing $cert.FriendlyName = “right_internal_wildcard”


    lastly, I verifed the cert friendlyname by typing $cert.FriendlyName

Certificates – Convert pfx to PEM and remove the encryption password on private key

I’ve recently ran into a few times where we had to move a certificate from Microsoft Exchange to a HAProxy load balancer. I was provided an exported key pair that had an encrypted private key (Password Protected).

We will seperate a .pfx ssl certificate to an unencrypted .key file and a .cer file

The end state is to get the private key decrypted, the public cert and the certificate chain in the .pem file to make it work with openssl/HAProxy.

Requirements:
Openssl installed
.pfx file (you need to know the password)
intermediate public cert (you can obatin this from your provider like Thawte)
root public cert (you can obatin this from your provider like Thawte)

Step 1
Extract the private key from the .pfx file (you need to know the password:

openssl pkcs12 -in [certificate.pfx] -nocerts -out [certificate-key-encrypted.key]

Step 2
Now lets decrypt the key:

openssl rsa -in [certificate-key-encrypted.key] -out [certificate-key-decrypted.key]

Step 3
Now lets extract the public certificate:

openssl pkcs12 -in [certificate.pfx] -clcerts -nokeys -out [certificate.crt]

Step 4
You also need all the public certs in the chain up to the root. I’m talking about these:
Root and Intermediate Certs

Step 5
now create a new text file (don’t use notepad) and put your public, private, intermediate public and root public together. It’s simple and should look like this:

-----BEGIN CERTIFICATE-----
### Replace with your public certificate ###
### From step 3 above ###
-----END CERTIFICATE-----
-----BEGIN CERTIFICATE-----
### replace with your intermediate public cert ###
-----END CERTIFICATE-----
-----BEGIN CERTIFICATE-----
### replace with your root public cert ###
-----END CERTIFICATE-----
-----BEGIN RSA PRIVATE KEY-----
### replace me with your .key file ###
### from step 2 above ###
-----END RSA PRIVATE KEY-----

Save the file as a .pem file.
If you want to view the cert on windows, simply rename the .pem to .cer

…This is how Ed does it šŸ™‚